I’ve called Citrix Support about this exact issue several months ago and was told there isn’t a supported way to do it and I would have to create a new machine catalog.
It turns out that isn’t correct!
There is a fairly simple way point to a new snapshot with PowerShell.
You may need to stop any Provisioning Tasks and remove them. They can get stuck when they can’t find the snapshot.
run
Get-ProvTask -Active $True
To see if you have any active tasks on your provisioning scheme
If you do, run
Stop-ProvTask -TaskId UidGoesHere
Then
Remove-ProvTask -TaskId UidGoesHere
After that you should be good to go with the commands from here http://support.citrix.com/article/CTX129205
Publish-ProvMasterVmImage -ProvisioningSchemeName "%provisioningSchemeName%" -MasterImageVM "%templatePSPath%"
EXAMPLE:
Publish-ProvMasterVmImage -ProvisioningSchemeName win7_new –masterimagevm XDHyp:\hostingunits\NEW\NEW-Win7.vm\existing.snapshot\Citrix_XD_win7- pooled.snapshot\Citrix_XD_win7-pooled.snapshot\sp1.snapshot\2505438.snapshot\afterupdate.snapshot
Hopefully this helps anyone that will inevitably run into this!
Full text of the CTX article below in case it disappears.
Instructions
Complete the following procedure to update the master image on Dedicated or Pooled machine types using PowerShell SDK:
Note: Changes applied to the master image of a Dedicated Catalog takes effect only for the new machines created from the image. These changes are not applied to the existing machines in the Catalog.
- Modify the master Virtual Machine or new virtual machine with the required changes.
- Take a snapshot of the modified virtual machine.
- Start PowerShell on Delivery Controller (Controller).
- Run command Add-PSSnapIn citrix*.
- Run command Get-ProvScheme.
This displays a list of Provisioning Scheme(s) from the XenDesktop site. Make a note of the MasterImageVM entry.
Example
ProvisioningSchemeUid : 2a01126c-0352-41e0-9603-9118120e15c3 ProvisioningSchemeName : win7ded_anu . . MasterImageVM : XDHyp:\HostingUnits\anu\Anu- Win7.vm\existing.snapshot\Citrix_XD_win7-pooled.snapshot\Citrix_XD_win7-pooled.snapshot\sp1.snapshot\248813.snapshot MasterImageVMDate : 4/14/2011 6:01:21 PM IdentityPoolUid : 1d227066-f5ee-41b9-8a99-753e9d060e42 IdentityPoolName : win7ded HostingUnitUid : d534c437-6c65-4659-97db-d6b86534685b HostingUnitName : anu . . VMMetadata : {A, A, E, A...}Note: This preceding information is also required for reverting to the previous image.
- Run the following command to display the list of snapshots on the virtual machine:
Get-ChildItem -Recurse -Path ‘XDHyp:\hostingunits\%hostName%\%vmName%.vm’
ExampleGet-ChildItem -Recurse -Path ‘XDHyp:\hostingunits\anu\Anu-Win7.vm
Where, hostname is anu and vmname is Anu-win7.
Output
PSPath         : Citrix.Host.Admin.V1\Citrix.Hypervisor::XDHyp:\hostingunits\anu\Anu- Win7.vm\existing.snapshot\Citrix_XD_win7-pooled.snapshot\Citrix_XD_win7- pooled.snapshot\sp1.snapshot\2505438.snapshot\afterupdate.snapshot
PSParentPath  : Citrix.Host.Admin.V1\Citrix.Hypervisor::XDHyp:\hostingunits\anu\Anu-
Win7.vm\existing.snapshot\Citrix_XD_win7-pooled.snapshot\Citrix_XD_win7- pooled.snapshot\sp1.snapshot\2505438.snapshot
PSChildName   : afterupdate.snapshot
.
.
ObjectPath     : /Anu-Win7.vm/existing.snapshot/Citrix_XD_win7-pooled.snapshot/Citrix_XD_win7-pooled.snapshot/sp1.snapshot/2505438.snapshot/afterupdate.snapshot
FullPath       : XDHyp:\hostingunits\anu\Anu-Win7.vm\existing.snapshot\Citrix_XD_win7- pooled.snapshot\Citrix_XD_win7- pooled.snapshot\sp1.snapshot\2505438.snapshot\afterupdate.snapshot
IsSymLink      : False
AdditionalData : {}
- Run the following command to publish the details of the master virtual machine:
Publish-ProvMasterVmImage -ProvisioningSchemeName “%provisioningSchemeName%” -MasterImageVM “%templatePSPath%”
Example
Publish-ProvMasterVmImage -ProvisioningSchemeName win7ded_anu –masterimagevm XDHyp:\hostingunits\anu\Anu-Win7.vm\existing.snapshot\Citrix_XD_win7- pooled.snapshot\Citrix_XD_win7-pooled.snapshot\sp1.snapshot\2505438.snapshot\afterupdate.snapshot
Where %provisioningSchemeName% is win7ded_anu and %templatePSPath% is XDHyp:\hostingunits\anu\Anu-Win7.vm\existing.snapshot\Citrix_XD_win7- pooled.snapshot\Citrix_XD_win7- pooled.snapshot\sp1.snapshot\2505438.snapshot\afterupdate.snapshot.
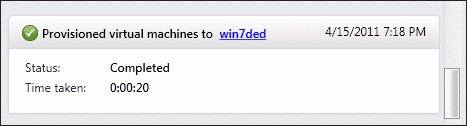
The preceding command updates the master image and displays the result.
Output
TaskId                     : c6b5acf4-f950-428c-82a4-0150dab99945
Active                     : False
Host                       : XX-W2K8R2-DDC
DateStarted                : 4/15/2011 5:01:44 PM
Type                       : PublishImage
Metadata                   : {}
WorkflowStatus             : Completed
ProvisioningSchemeUid      : 2a01126c-0352-41e0-9603-9118120e15c3
ProvisioningSchemeName     : win7ded_anu

MasterImage                : XDHyp:\HostingUnits\anu\Anu- Win7.vm\existing.snapshot\Citrix_XD_win7-pooled.snapshot\Citrix_XD
                             _win7- pooled.snapshot\sp1.snapshot\2505438.snapshot\afterupdate.snapshot
HostingUnitName            : anu
HostingUnitUid             : d534c437-6c65-4659-97db-d6b86534685b
ADIdentityPoolName         :

ADIdentityPoolUid          : 1d227066-f5ee-41b9-8a99-753e9d060e42

TaskState                  : Finished
TaskStateInformation       :
TaskProgress               : 100
DiskSize                   : 24
The following confirmation message appears in the Citrix Studio action pane:

This is for a Full Copy, not fast copy Machine catalog that is persistent or Static correct?
If you have persistent/static machines then it’s only going to use the new master image when you make new ones.
Hi Mike – Thanks for sharing…I have used this method for many Dedicated Catalogs in the past with great success. I have 2 questions if you are willing to read them. I understand the full clone MCS world pretty well, and understand it’s limitations.
1 – We have a Machine Catalog “sprawl” issue. Our build team deploys an entirely new VM (Master1) that is almost identical to the one before it (maybe some new software they didn’t want to distribute via SCCM or something) causing me to create a new MC and different Master (Master2). Given the method of “telling” the Catalog what Master to use by using Publish-ProvMasterVmImage, is it possible to replace Master1 with Master2? I want any new machines built to be a full clone of Master2…users having a Master1 VM already is fine, but the audience is the same, same department, same AD Groups…I am trying to avoid yet another Catalog creation each time the build team decides to provide a new image (which becomes Master3 and I am left with 2 stagnant Catalogs that exist only to store the VMs created with 1&2).
2 – Along the same thought process of question 1…let’s say I have 10 Machine Catalogs, all Full Clone static machines, all obviously have a unique Master they were born from. All 10 of these Catalogs are serving the same Delivery Group, it’s a Standard Win10 Corp Image. None of the 10 will be used again to CREATE new VMs, they are just holding cells. Is it possible to get all of these guys in one Catalog? Preferably, the current one that is actually creating new VMs?
Thanks in advance!
Hmmmm. I think scenario 1 would be the better option as you run into a limit eventually on how many catalogs can serve a delivery group. Citrix recommends keeping it 1 to 1. I wouldn’t go higher than 100 for example.
The only issue you run into when changing the master VM is if any of the hardware changes, say you add extra CPU sockets to the template.
Assuming none of that happens, I think you should be fine doing it the way you propose by swapping out the master and keeping the delivery group.
What do you do with all the old snapshot shots? If you delete them then it will break the Provision Scheme.
Don’t delete anything you didn’t create. If you delete the auto created snapshots that MCS creates as part of the provisioning process then yes, you will break your catalog. If you delete manually created snapshots the only thing that happens is you can’t roll back.